Customizing Arch Linux on a ThinkPad: A Minimal i3 Setup from Scratch
I’ve always gravitated toward tools that emphasize utility over flash. I care about speed, clarity, and control. I like setups that stay out of the way and let me think. The more time I’ve spent working in Linux, the more that ethos has solidified: I don’t want animations, theming engines, or bloated environments chewing up resources just so I can open a terminal. What I want is something fast and minimal.
This post documents the process of taking a base Arch Linux install on a ThinkPad and building it into a complete, minimalist desktop environment using the i3 window manager and a few carefully chosen tools. Beyond just what I installed, this post also explains what tradeoffs were made, what worked well, and how I automated it all into a portable setup script I can reuse on other machines.
Why i3 and X11?
There’s no shortage of modern options when it comes to window managers and display servers. Wayland is steadily maturing and tiling window managers like Sway are great. But for this setup, I went with i3 on X11. Why?
- Maturity: X11 and i3 are battle-tested. I don’t have to think about app compatibility or compositors not playing nice.
- Simplicity: The i3 config is dead simple and human-readable. Every behavior is predictable and fast.
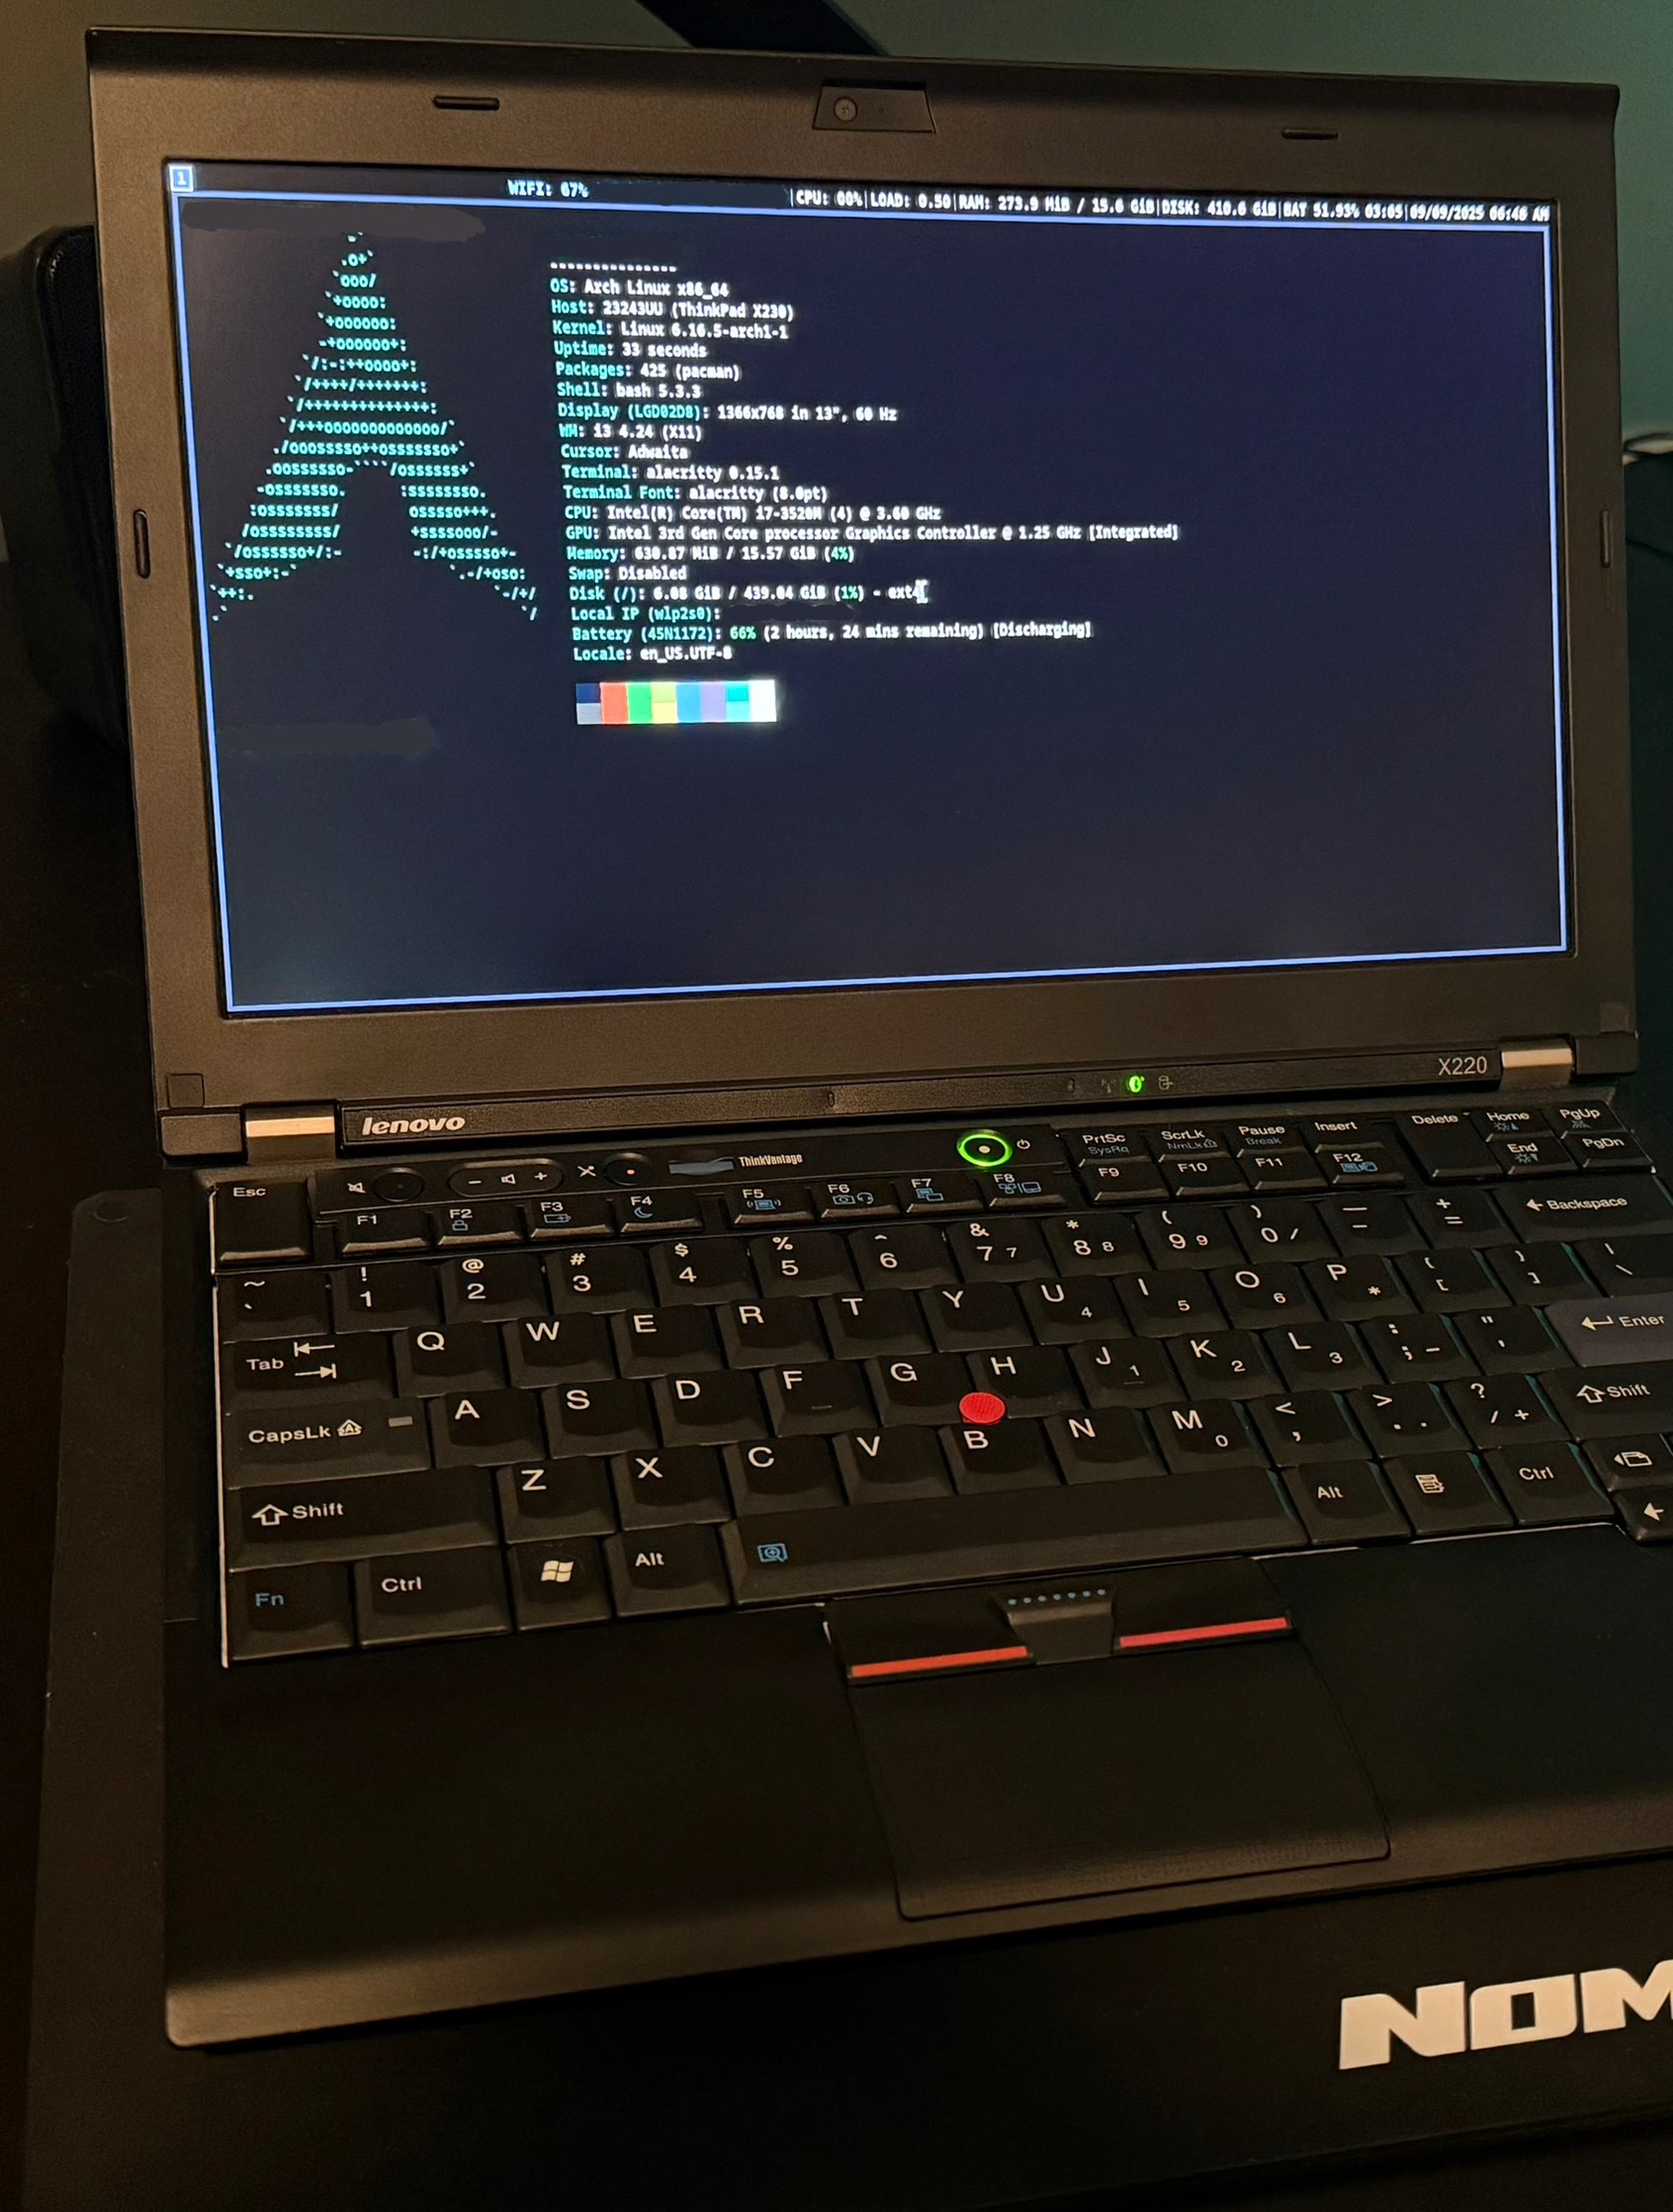
- Low Overhead: This runs great on a 10+ year old ThinkPad X230. RAM usage is low, startup is instant.
The Base: Clean Arch Install
This setup assumes you’ve already installed Arch Linux manually using the Arch ISO and have networking configured. I typically do this by booting from USB, partitioning with `cfdisk`, mounting with `pacstrap`, setting up `systemd-boot`, and enabling `systemd-networkd` and `systemd-resolved`. If you’ve never installed Arch from scratch, the Arch Wiki is still the best resource out there.
Once you have a working base install and can log in as your user, the rest of the setup can be fully automated.
Install Script Overview
I created a setup script that handles everything from package installation to copying over dotfiles. The goal was to go from a fresh TTY login to a fully usable i3 desktop with Firefox, Alacritty, and everything configured the way I like it with one command.
Here’s what the script installs and configures:
Packages Installed
- X11: `xorg-server`, `xorg-xinit`, `xf86-video-intel`, `mesa`
- Audio + Power: `pulseaudio`, `brightnessctl`
- i3 suite: `i3-wm`, `i3status`, `i3lock`, `dmenu`, `picom`
- Terminal + Apps: `alacritty`, `rofi`, `firefox`, `vim`, `fastfetch`
- Fonts: `ttf-dejavu` (clean, legible default)
Dotfiles and Configs
- Copies custom config files for i3, i3status, rofi, alacritty, and picom
- Sets up `.xinitrc` to start i3 via `exec i3`
- Modifies `.bash_profile` to automatically launch X on login from TTY1
- Hides unnecessary GUI launchers for `picom` and `rofi` using `NoDisplay=true`
Once installed, all you have to do is type `startx` or reboot and the system will drop straight into your i3 environment.
Key Config Choices
Alacritty: Terminal with Speed and Style
I prefer Alacritty over the more traditional `xterm` or `urxvt` because it’s GPU-accelerated, simple, and configurable via a single TOML file. I included a dark theme I actually use (Night Owl) and set padding, font size, and cursor style to make it feel polished without being flashy.
The theme file is stored in the directory of the Github repo of the setup script. This way, the `alacritty.toml` config can import it cleanly without having to vendor the entire theme pack.
Picom: A Touch of Compositing
While I don’t care for animations or transparency in general, enabling Picom gives just enough polish—borderless windows don’t flicker, screen tearing is gone, and shadows are subtle. My config disables blur, transitions, and keeps things snappy.
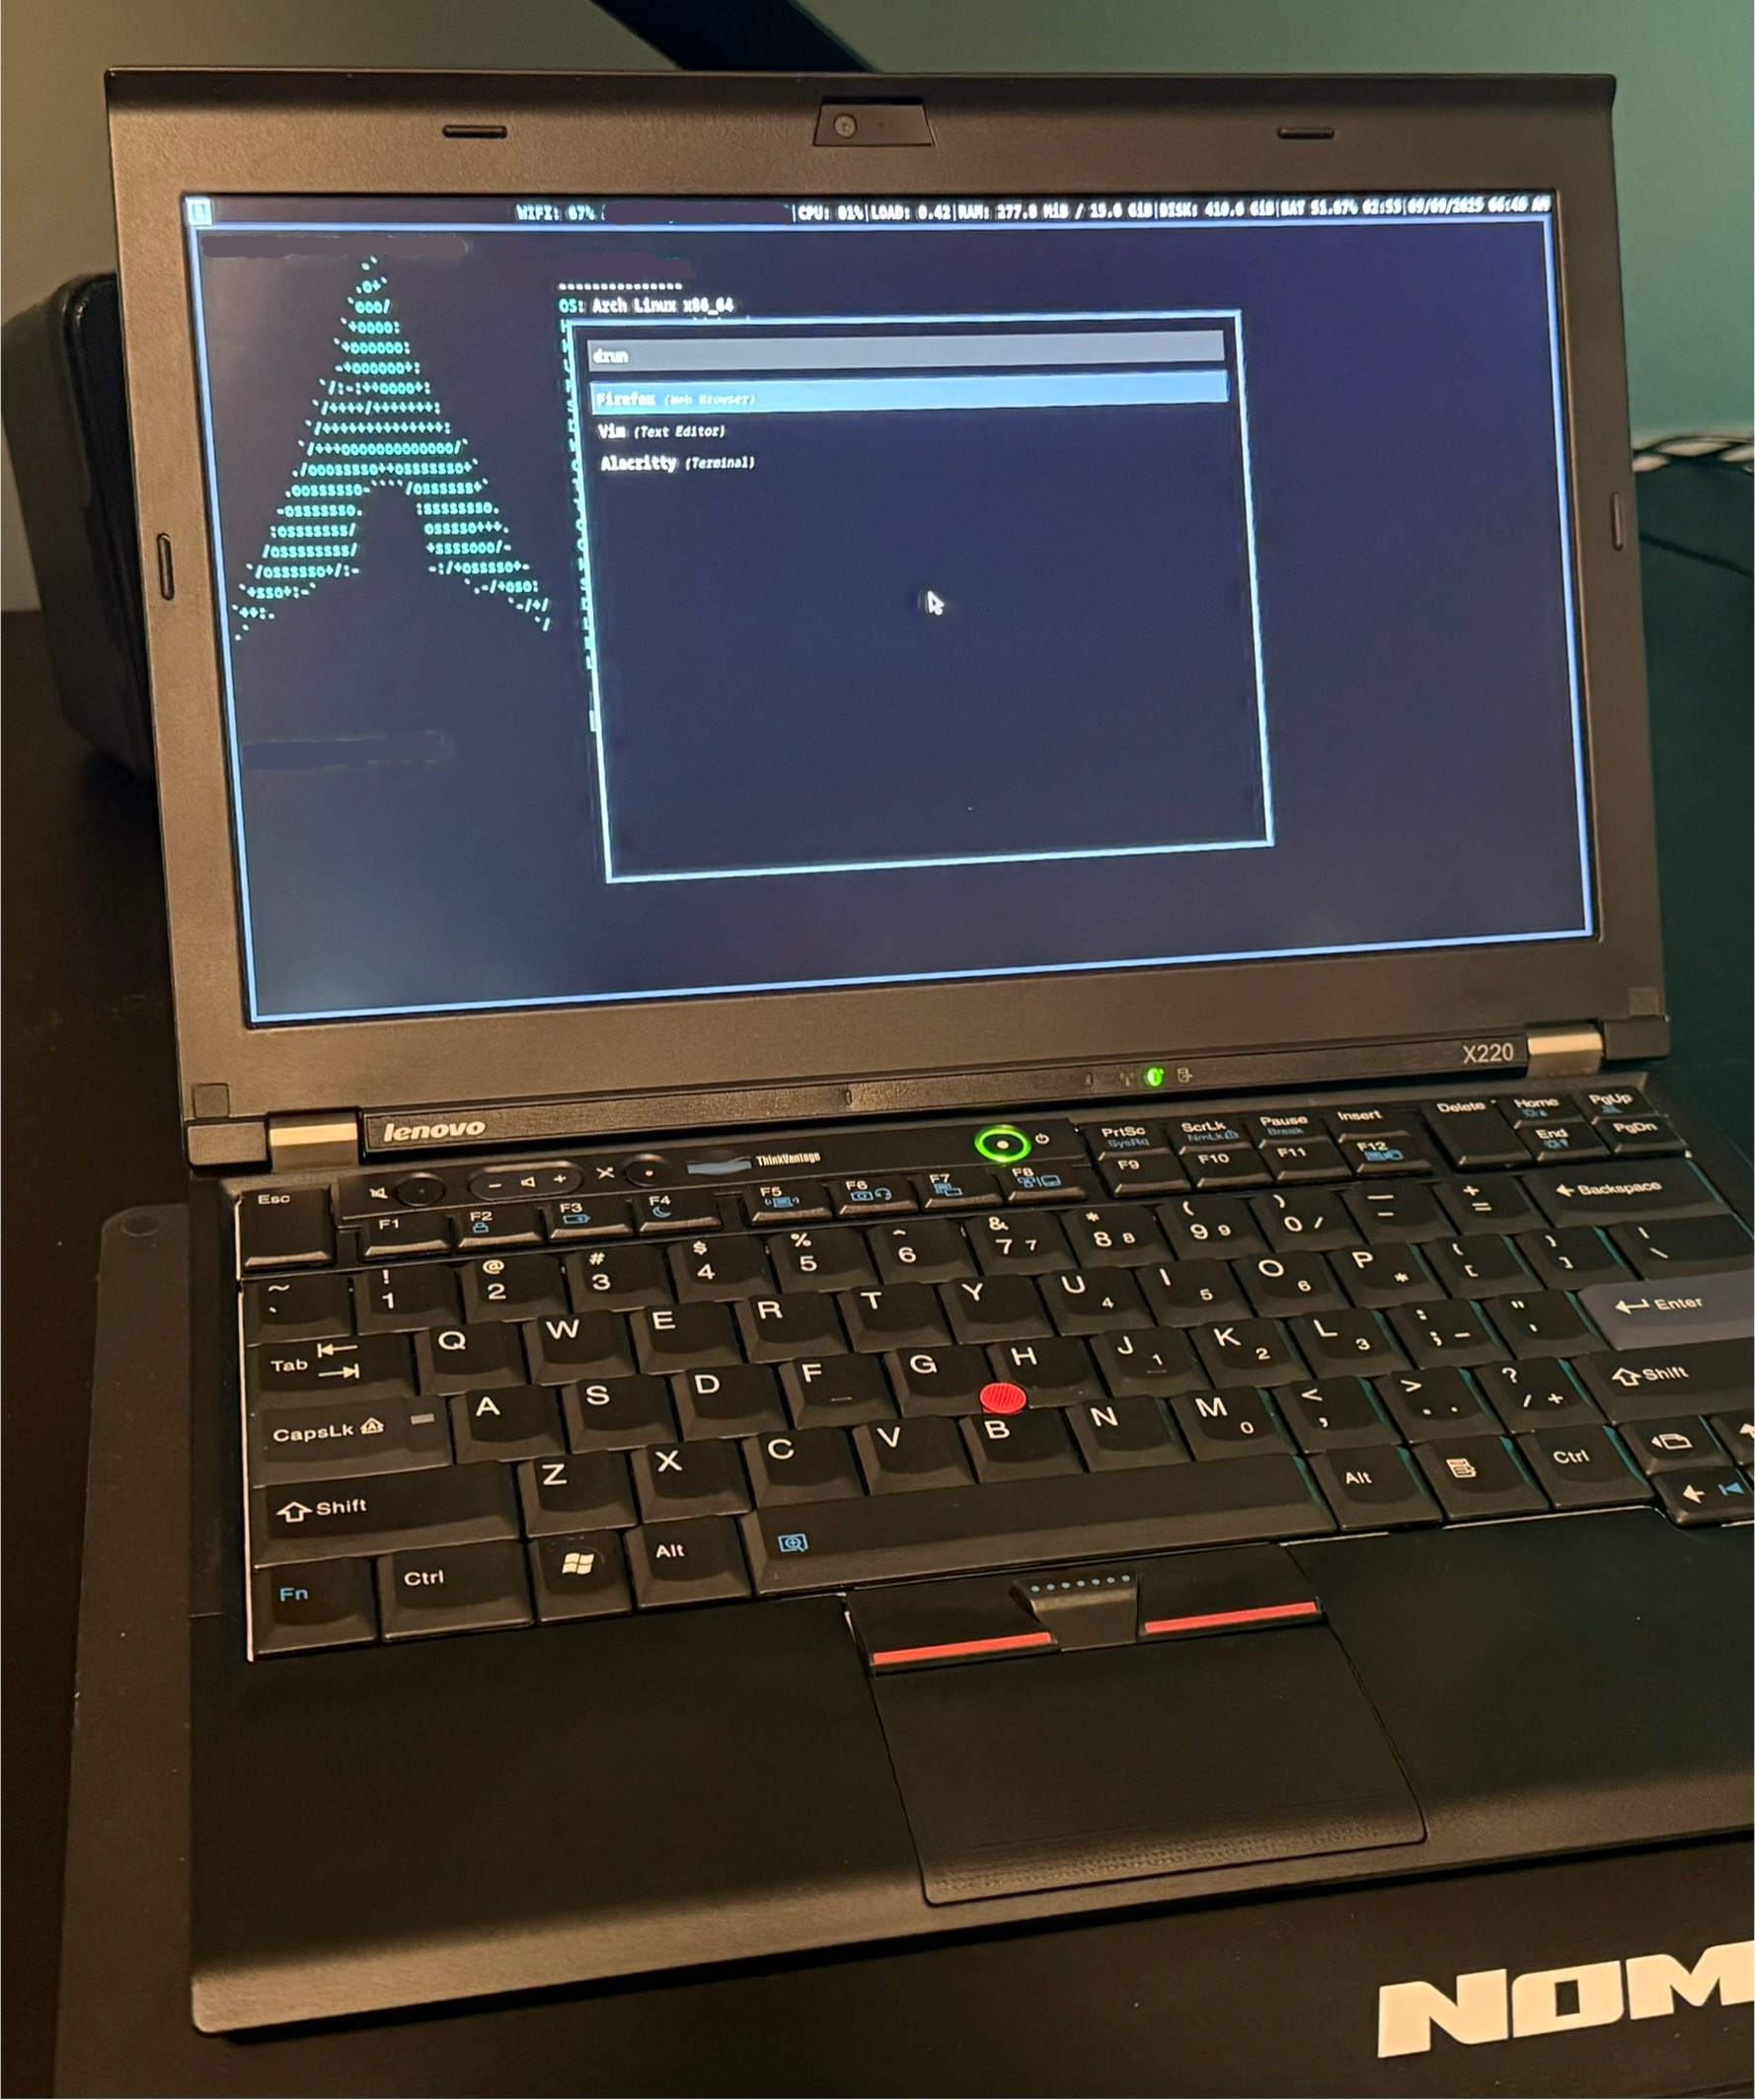
Rofi: App Launcher, Not a Theme Playground
I only use `rofi` as a lightweight app launcher. I deleted the unnecessary theme selector and included a minimal theme (`thinkpad.rasi`) styled for readability with no gradients or rounded corners.
Firefox and Post-Install Tweaks
Firefox is still my daily driver, but I want it hardened out of the box. After first launch (to allow profile creation), I run a separate script that copies over a curated `user.js` file with sane defaults for privacy and disables unnecessary telemetry and animations. It also applies a dark theme using `chrome/userChrome.css`.
This keeps my Firefox experience fast, private, and distraction-free, without needing extensions or tweaking settings manually every time.
Making It Portable: The Setup Repo
Once everything was working the way I liked it on one ThinkPad, I pulled all the configs and scripts into a GitHub repo so I could repeat the process on other machines. The folder structure is organized like this:
        arch-thinkpad-setup/
        ├── scripts/
        │   ├── install.sh
        │   ├── firefox-setup.sh
        ├── configs/
        │   ├── alacritty/
        │   │   ├── alacritty.toml
        │   │   └── themes/alacritty-theme/themes/night_owl.toml
        │   ├── i3/config
        │   ├── i3status/config
        │   ├── picom/picom.conf
        │   └── rofi/
        │       ├── config.rasi
        │       └── themes/thinkpad.rasi
        ├── bash/bashrc
        └── README.md
The main `install.sh` script handles everything end to end. You clone the repo, run the script with your username, and the environment is built in a matter of seconds.
If you want to try it out or fork it for your own needs, the repo is here:
Arch ThinkPad Setup Repo on Github

Lessons Learned
This project reinforced the value of a well-considered setup. Every piece of software installed was chosen for a reason: to create an environment that boots fast, looks clean, and gets out of my way. It’s easy to get distracted by window manager ricing or endless theming; I just wanted something that feels like a tool, not a toy.
i3 on a ThinkPad is a joy to use. The keyboard-driven workflow, the speed of X11, and the clarity of my config files make for a deeply satisfying daily environment. Now that I have this automated, I can replicate it on any machine in minutes, whether I’m setting up another ThinkPad or just want a minimal dev machine on a VM.
Future updates may include battery optimizations, system monitoring tools, and a few lightweight utilities. But at its core, this setup does exactly what I need it to do.
More Posts
- Why I built PDF Library - A Private, Distraction-Free Way to Read and Organize PDFs
- Flashing Coreboot on ThinkPad X230 - Disabling Intel Management Engine with Skulls firmware for enhanced security
- Arch Linux Installation on Legacy Hardware - Complete setup guide for 2012 ThinkPad X230
- ThinkPad Classic Keyboard Retrofit - Replacing chiclet keyboard with 7-row classic layout
- Building a Secure Home Lab - Network design for remote access, media storage, and VPN infrastructure
- Building CalcPlus, PDFDarkMode, and MemoryPush - Why and how I built these mobile apps