ThinkPad Classic Keyboard Retrofit: X220 7-Row on an X230

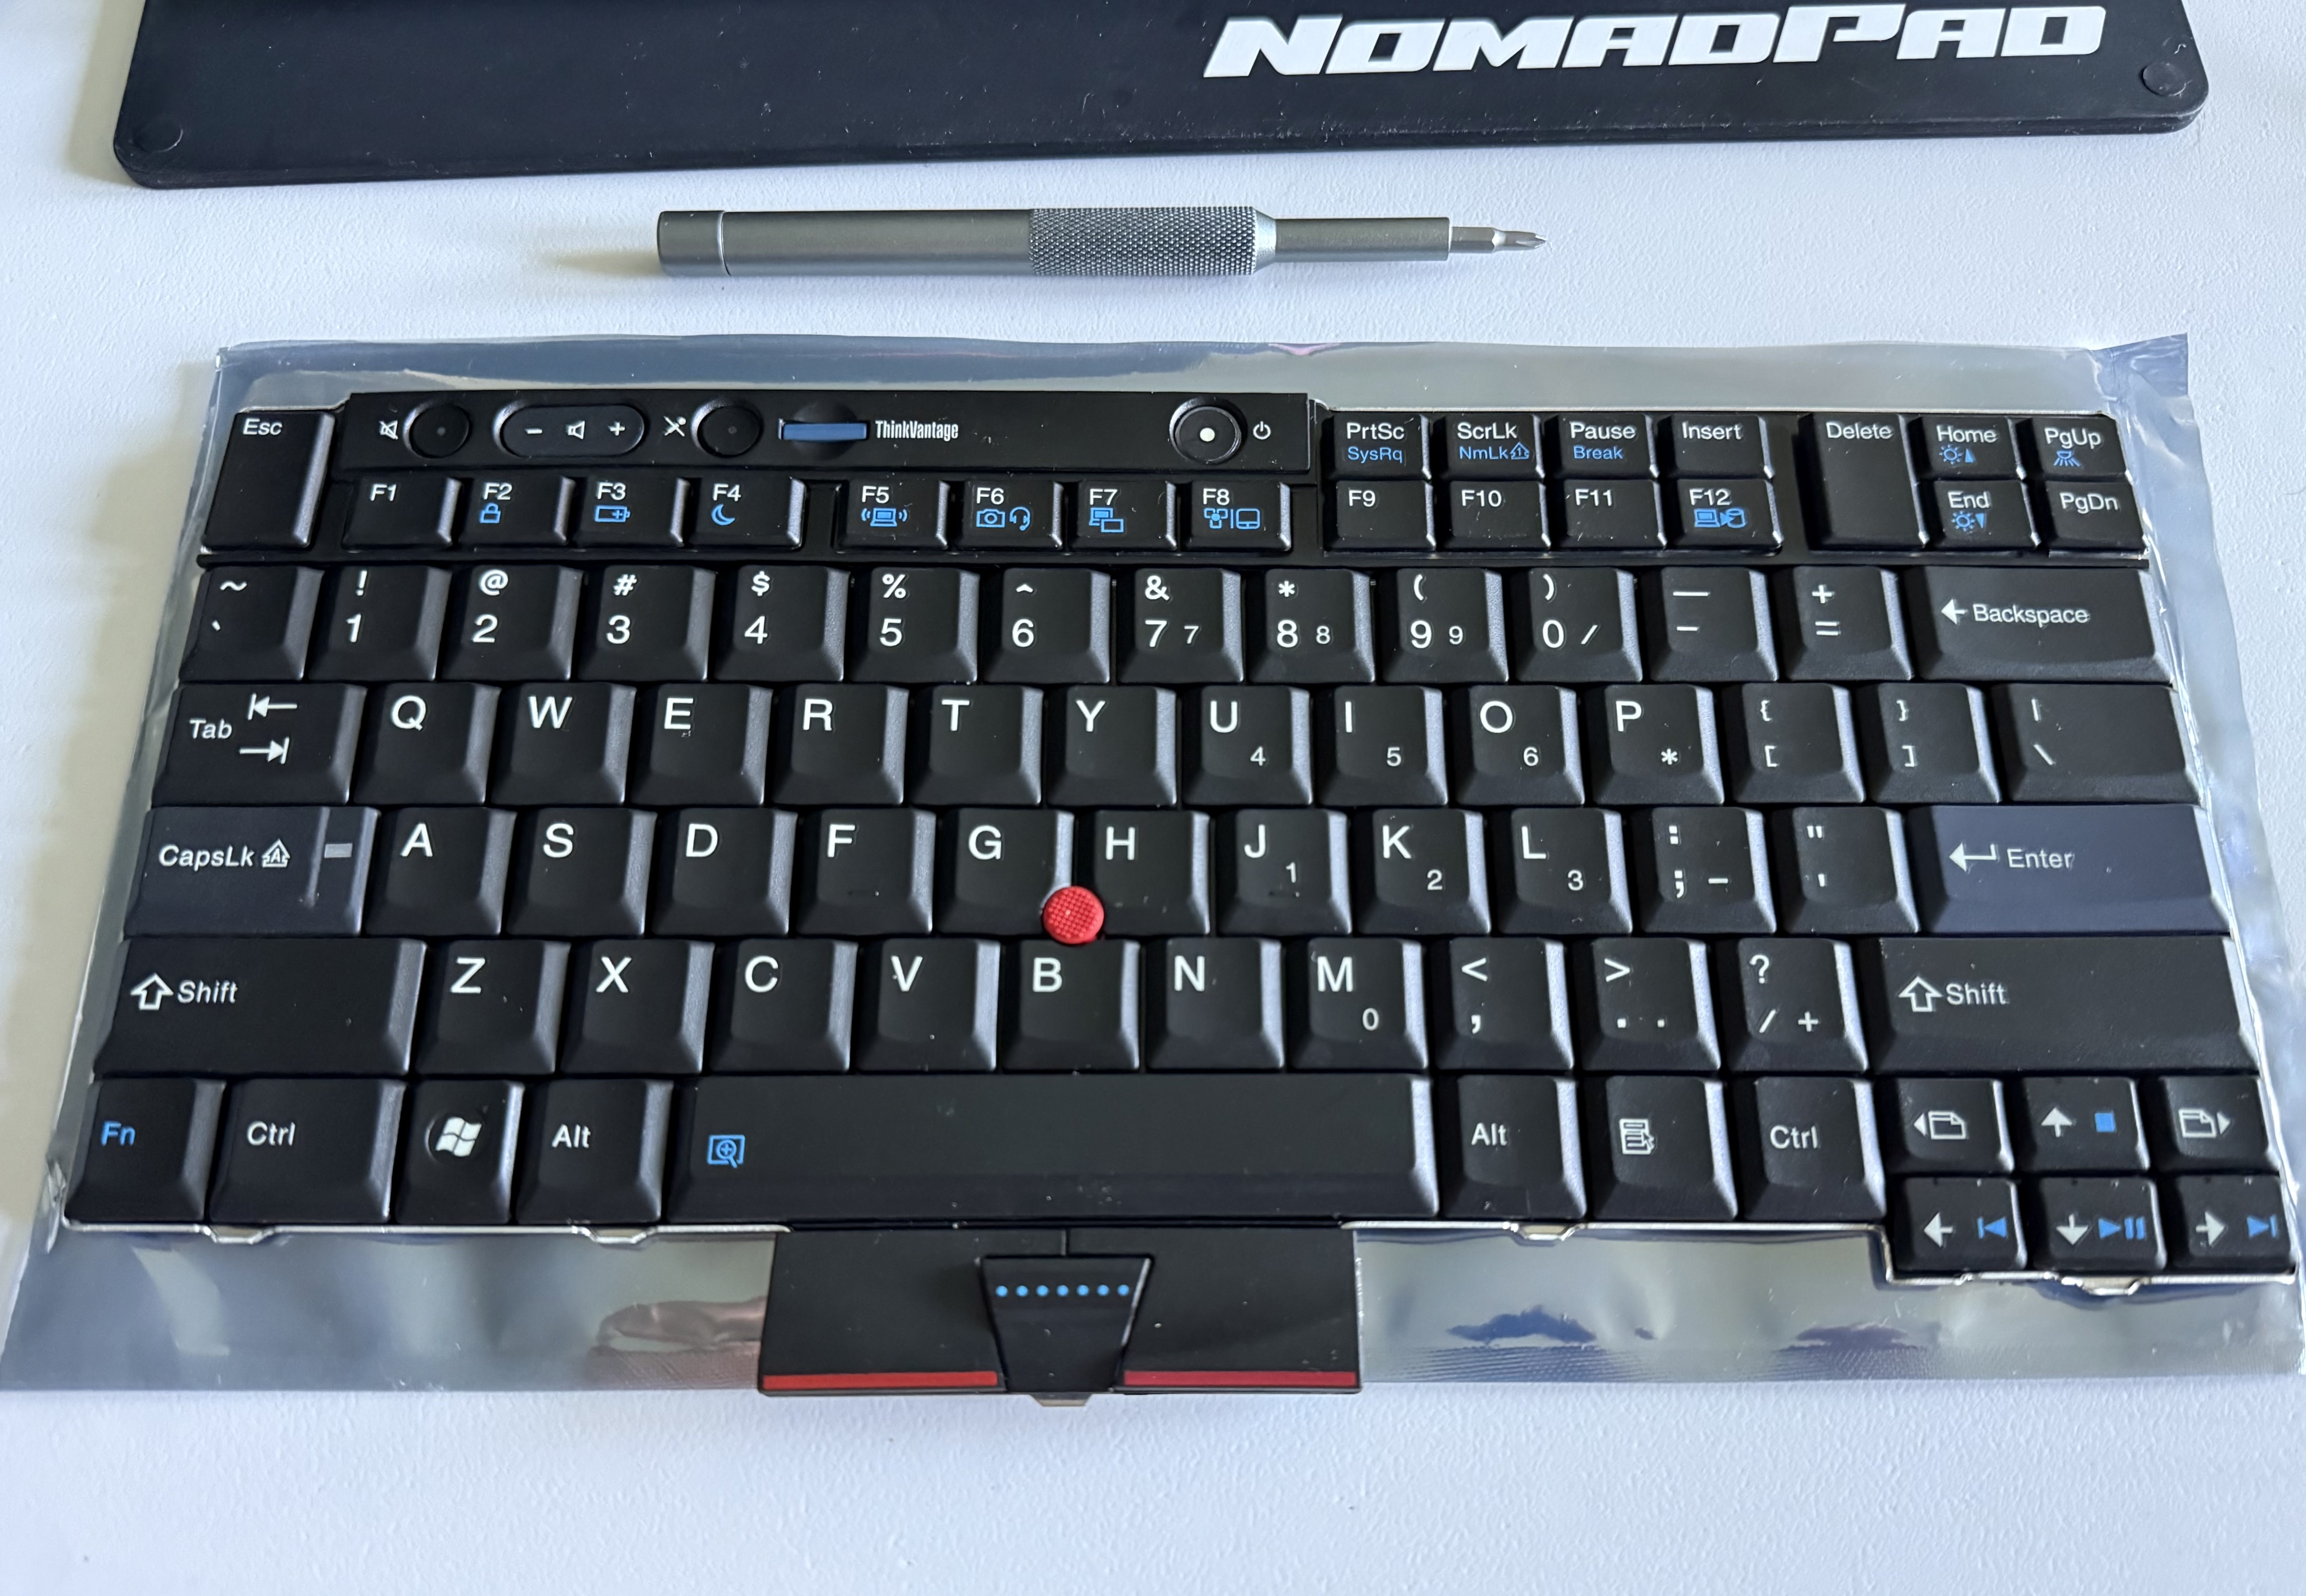
ThinkPads built their reputation on a few simple truths: they’re fixable, they last, and the keyboards are best-in-class. The last X-series to ship with the iconic 7-row layout was the X220. With the X230, Lenovo switched to a chiclet layout. It’s fine, but if you spend your day in terminals, editors, and shortcuts, the 7-row board feels like home. That’s why a whole micro-ecosystem exists around retrofitting an X220 keyboard into an X230.
Why Mod the Keyboard?
- Keyfeel and travel: crisp actuation and deep travel that’s rare on modern laptops.
- Productivity cluster: dedicated keys like Insert, Home/End, PgUp/PgDn, and a proper 7-row layout.
- Serviceability: both the keyboard and palm rest are field-replaceable, so the retrofit is realistic for a single evening project once you know the steps.
The catch: the X230’s embedded controller (EC) expects the chiclet matrix. Dropping in a 7-row board works electrically, but a few keys report the “wrong” scancodes. Historically, the clean fix is an EC firmware patch.
Pin Isolation to Prevent Overheating
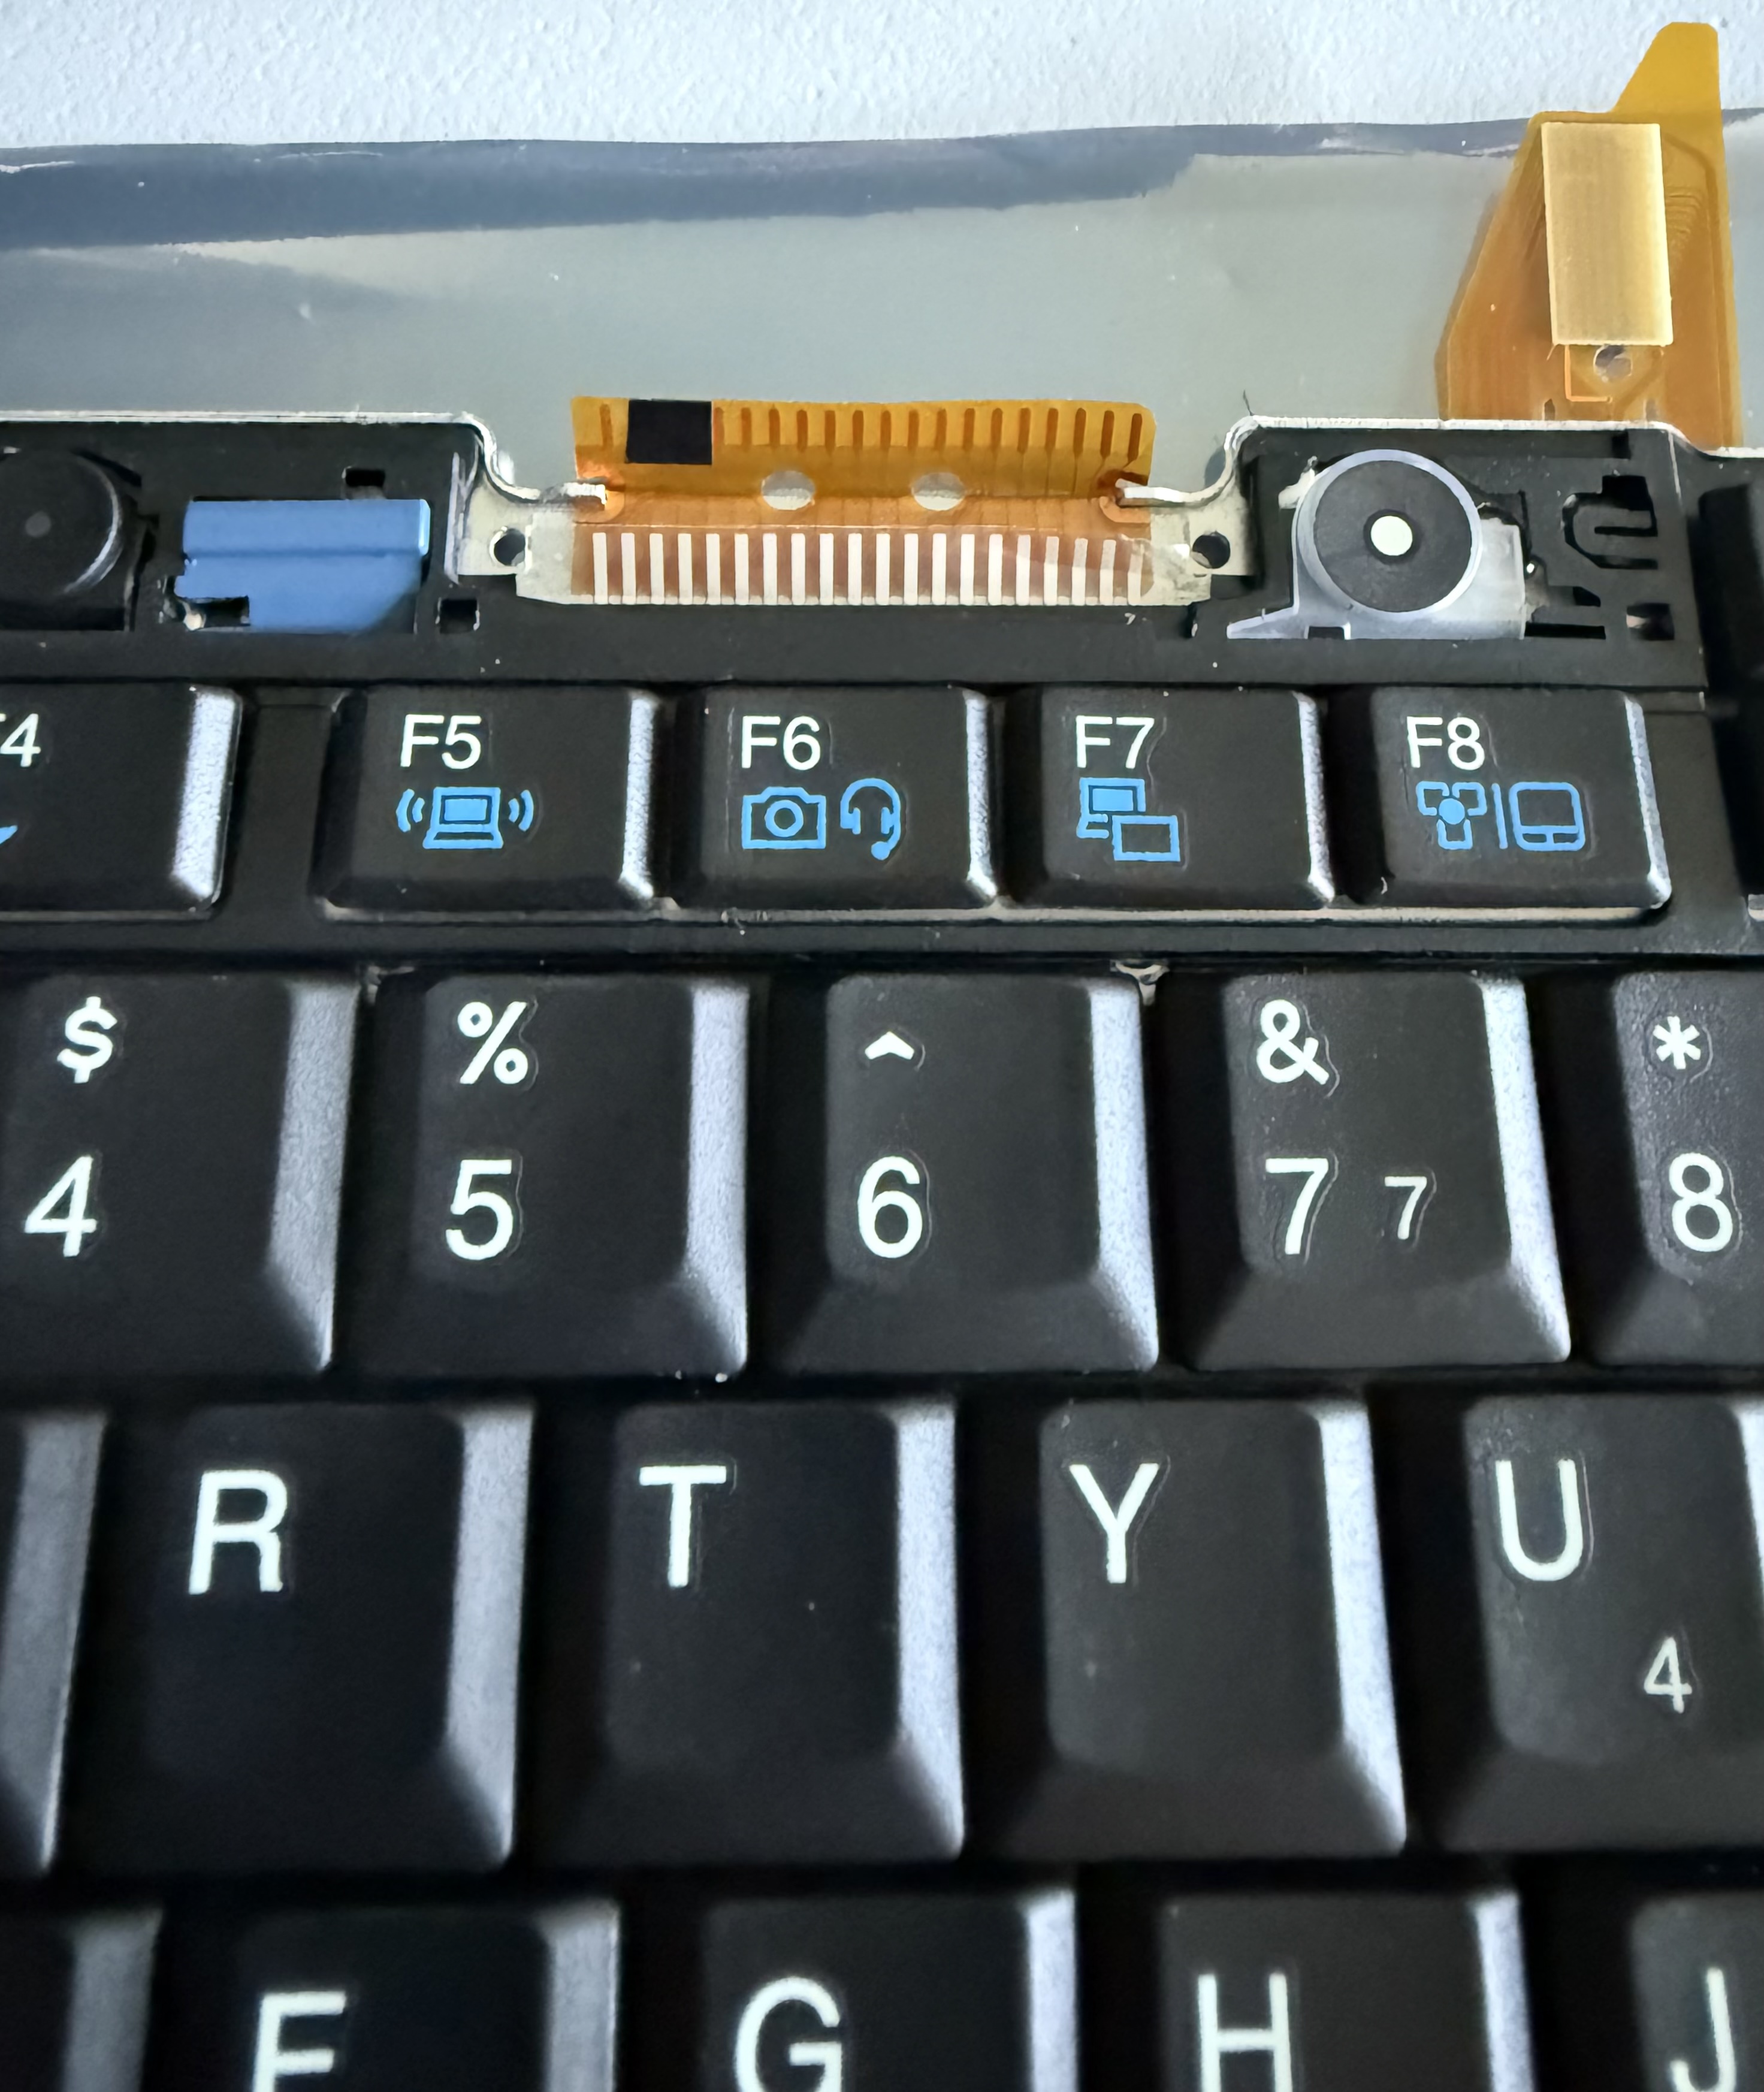
The X220 and X230 keyboards use slightly different pinouts. On the X230, pins #25, #27, and #29 are separated, while on the X220 they are internally tied together. Plugging an X220 keyboard directly into an X230 without modification can create a short circuit, potentially leading to overheating or permanent keyboard damage.
The standard workaround is simple: apply a small strip of electrical tape over pins #25, #27, and #29 on the X220 keyboard’s ribbon cable before installation. This prevents the unwanted connection while leaving all other pins untouched.
Some users have reported years of trouble-free use without performing this mod, but documented cases show burn marks appearing on the keyboard’s ribbon cable when the pins were left unisolated. A thin piece of electrical tape provides a safe margin, and ensures long-term stability of the retrofit.
The EC Patch: hamishcoleman/thinkpad-ec
Hamish Coleman’s thinkpad-ec project provides a way to patch the EC firmware so the X220 keyboard maps perfectly on an X230. The usual flow:
- Obtain Lenovo’s official X230 EC update package.
- Extract the EC images (
.FL1/.FL2). - Use
thinkpad-ecto build a patched image. - Flash from a DOS environment with Lenovo’s flash utility (e.g.,
phlash16).
Where I Tripped: Coreboot First, EC Later
On my machines, I prioritized firmware hardening: I flashed Coreboot (Skulls) first to disable Intel ME and modernize the boot path. That worked great for security, but it complicated the EC flash. Lenovo’s DOS/Windows tools expect the stock Lenovo BIOS runtime. Once Coreboot is installed, those vendor flash tools don’t always run properly. You can still program the EC externally, but that means cracking the case again and using an SPI programmer on the right chip. It’s doable, just heavier weight.
Given that I already had a solid Coreboot setup and backups, I had two choices:
- Revert to stock BIOS, patch the EC the official way, then re-flash Coreboot.
- Keep Coreboot and work around the few mis-mapped keys in software.
I chose the second path for now. It’s reversible, keeps the system secure, and avoids an extra round of hardware flashing.
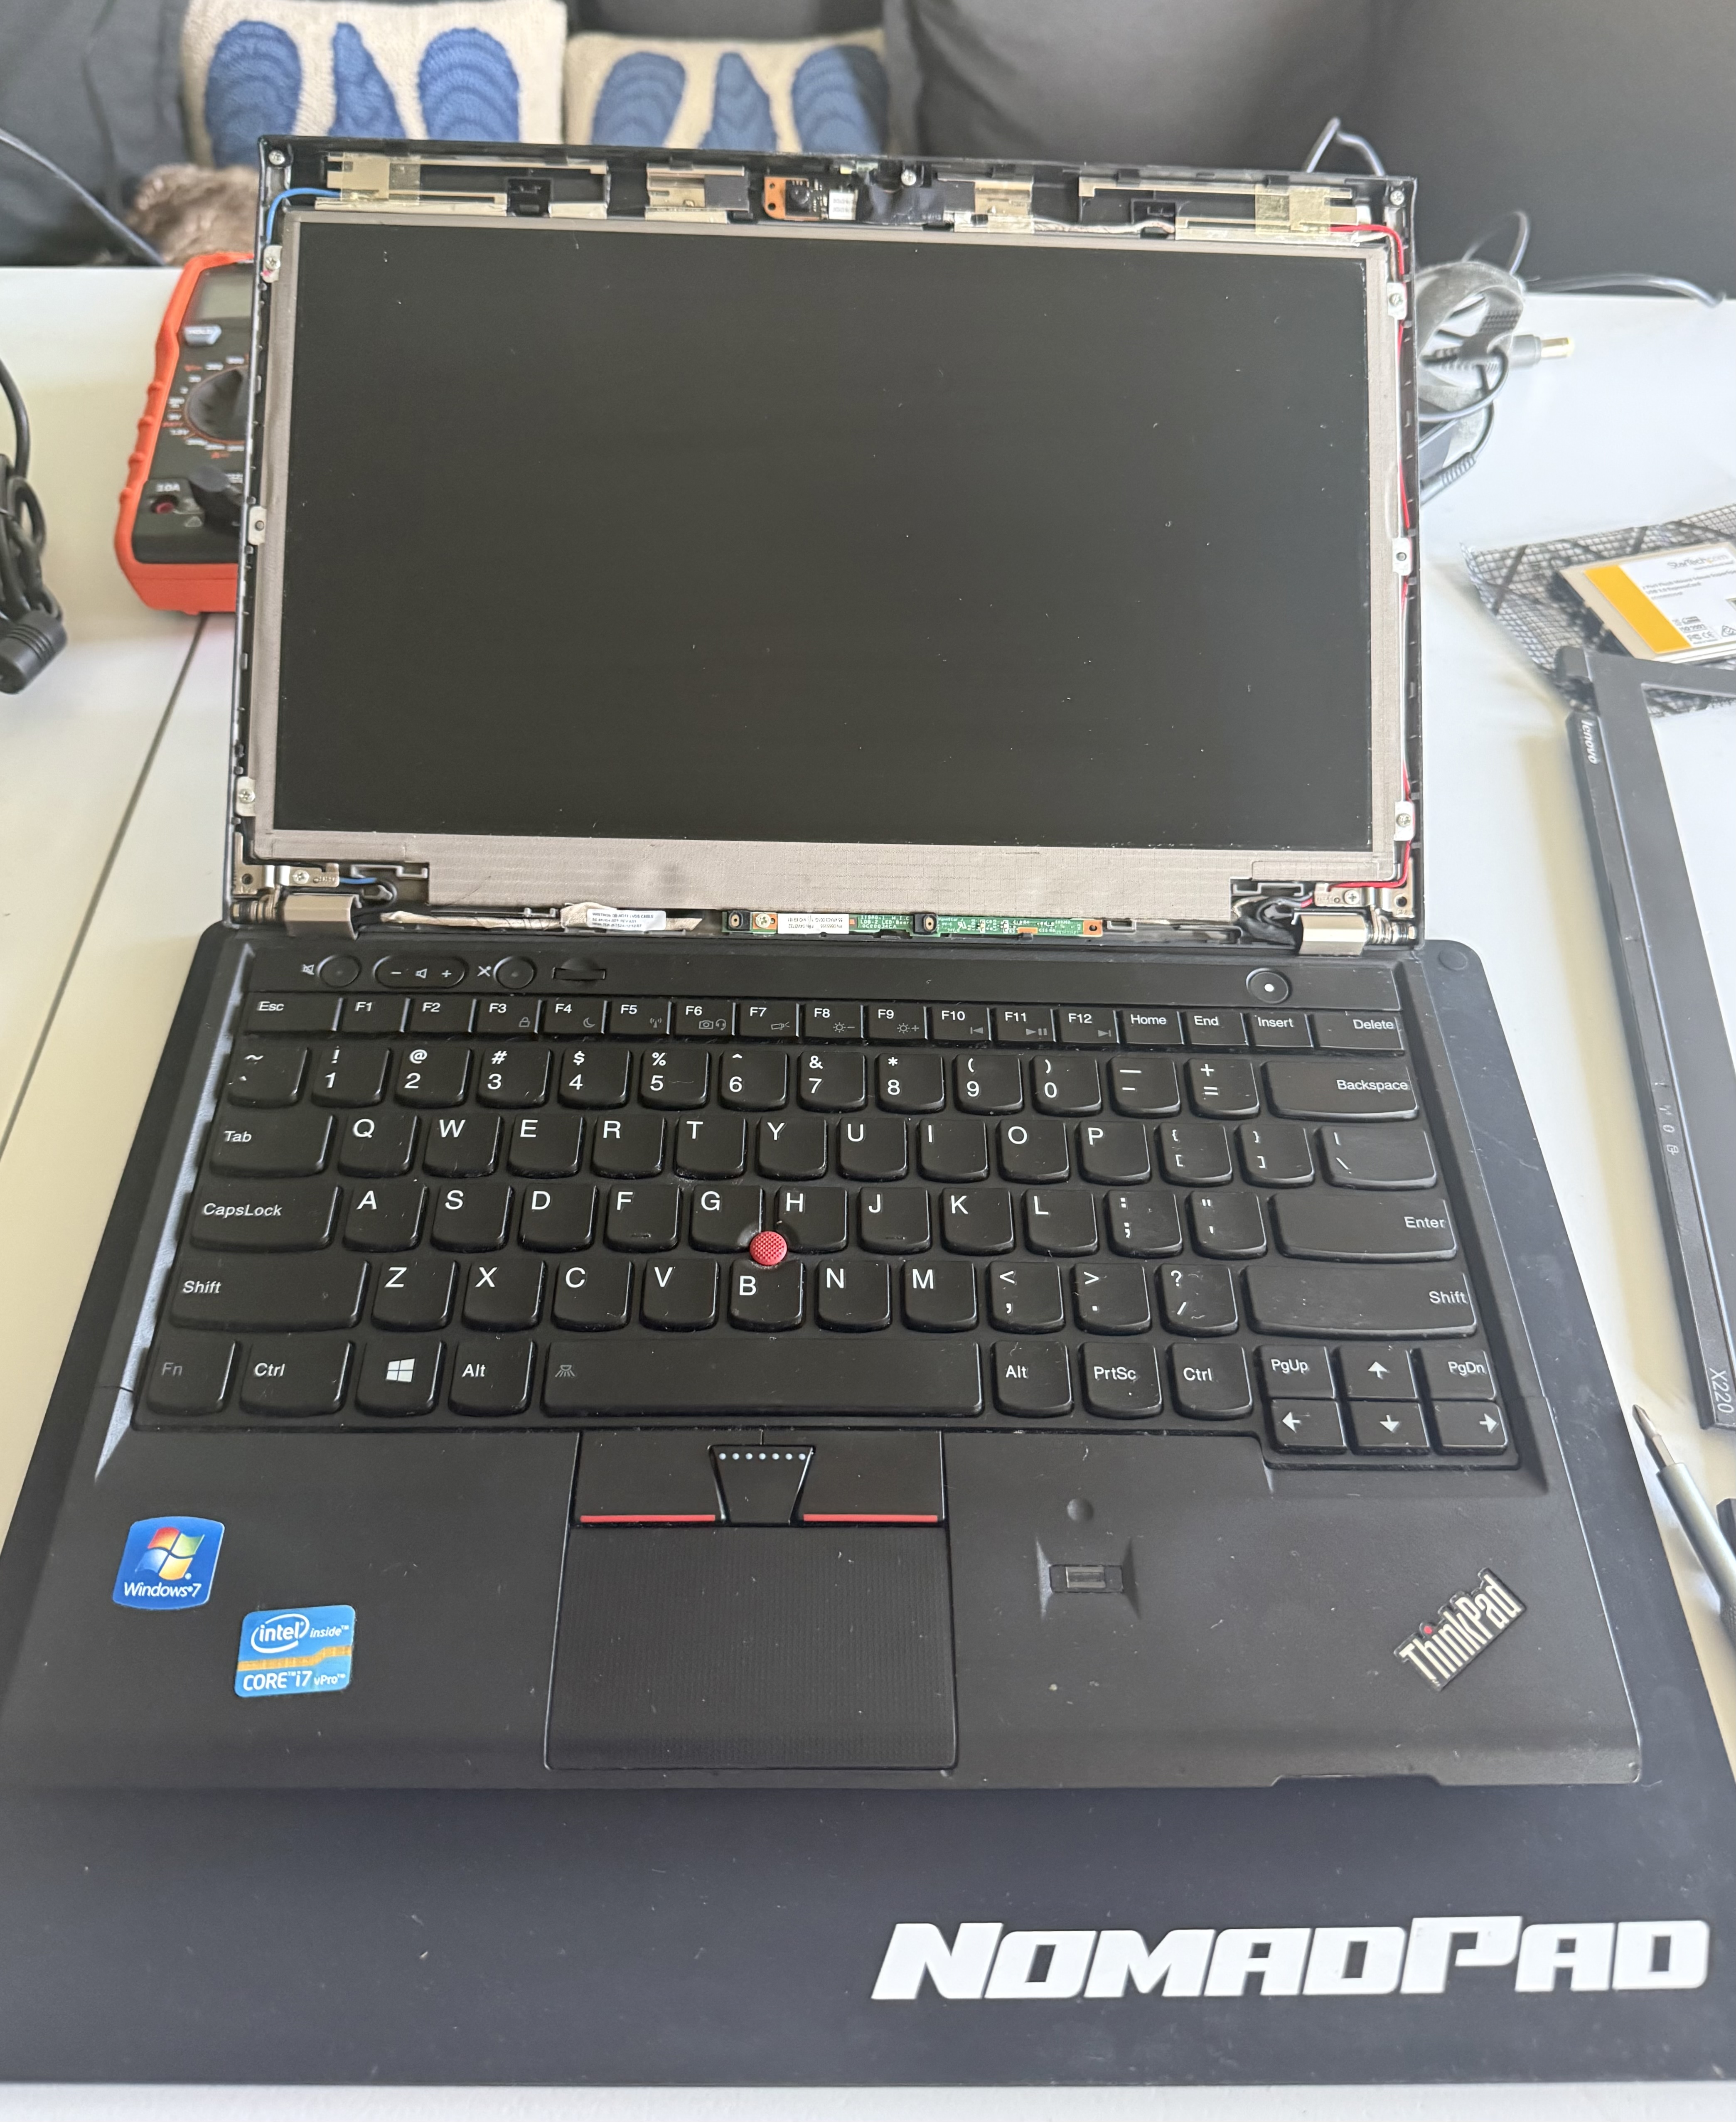
The Hardware Swap
The physical retrofit is straightforward and well documented:
- Power off, disconnect battery and AC.
- Remove palm rest and keyboard per the X230 hardware maintenance manual.
- Install the X220 palm rest (if you’re going for the full classic setup) and 7-row keyboard.
- Route ribbon cables carefully. On the palm-rest FFC, the blue stiffener faces the ZIF latch per Lenovo’s orientation. Lock the connector evenly.
At this point the machine boots and the keyboard works. A few Fn combos and the Menu/PrtSc/Insert cluster won’t be perfect without the EC patch, which brings us to software remapping.
Software Mapping Instead of EC Flash
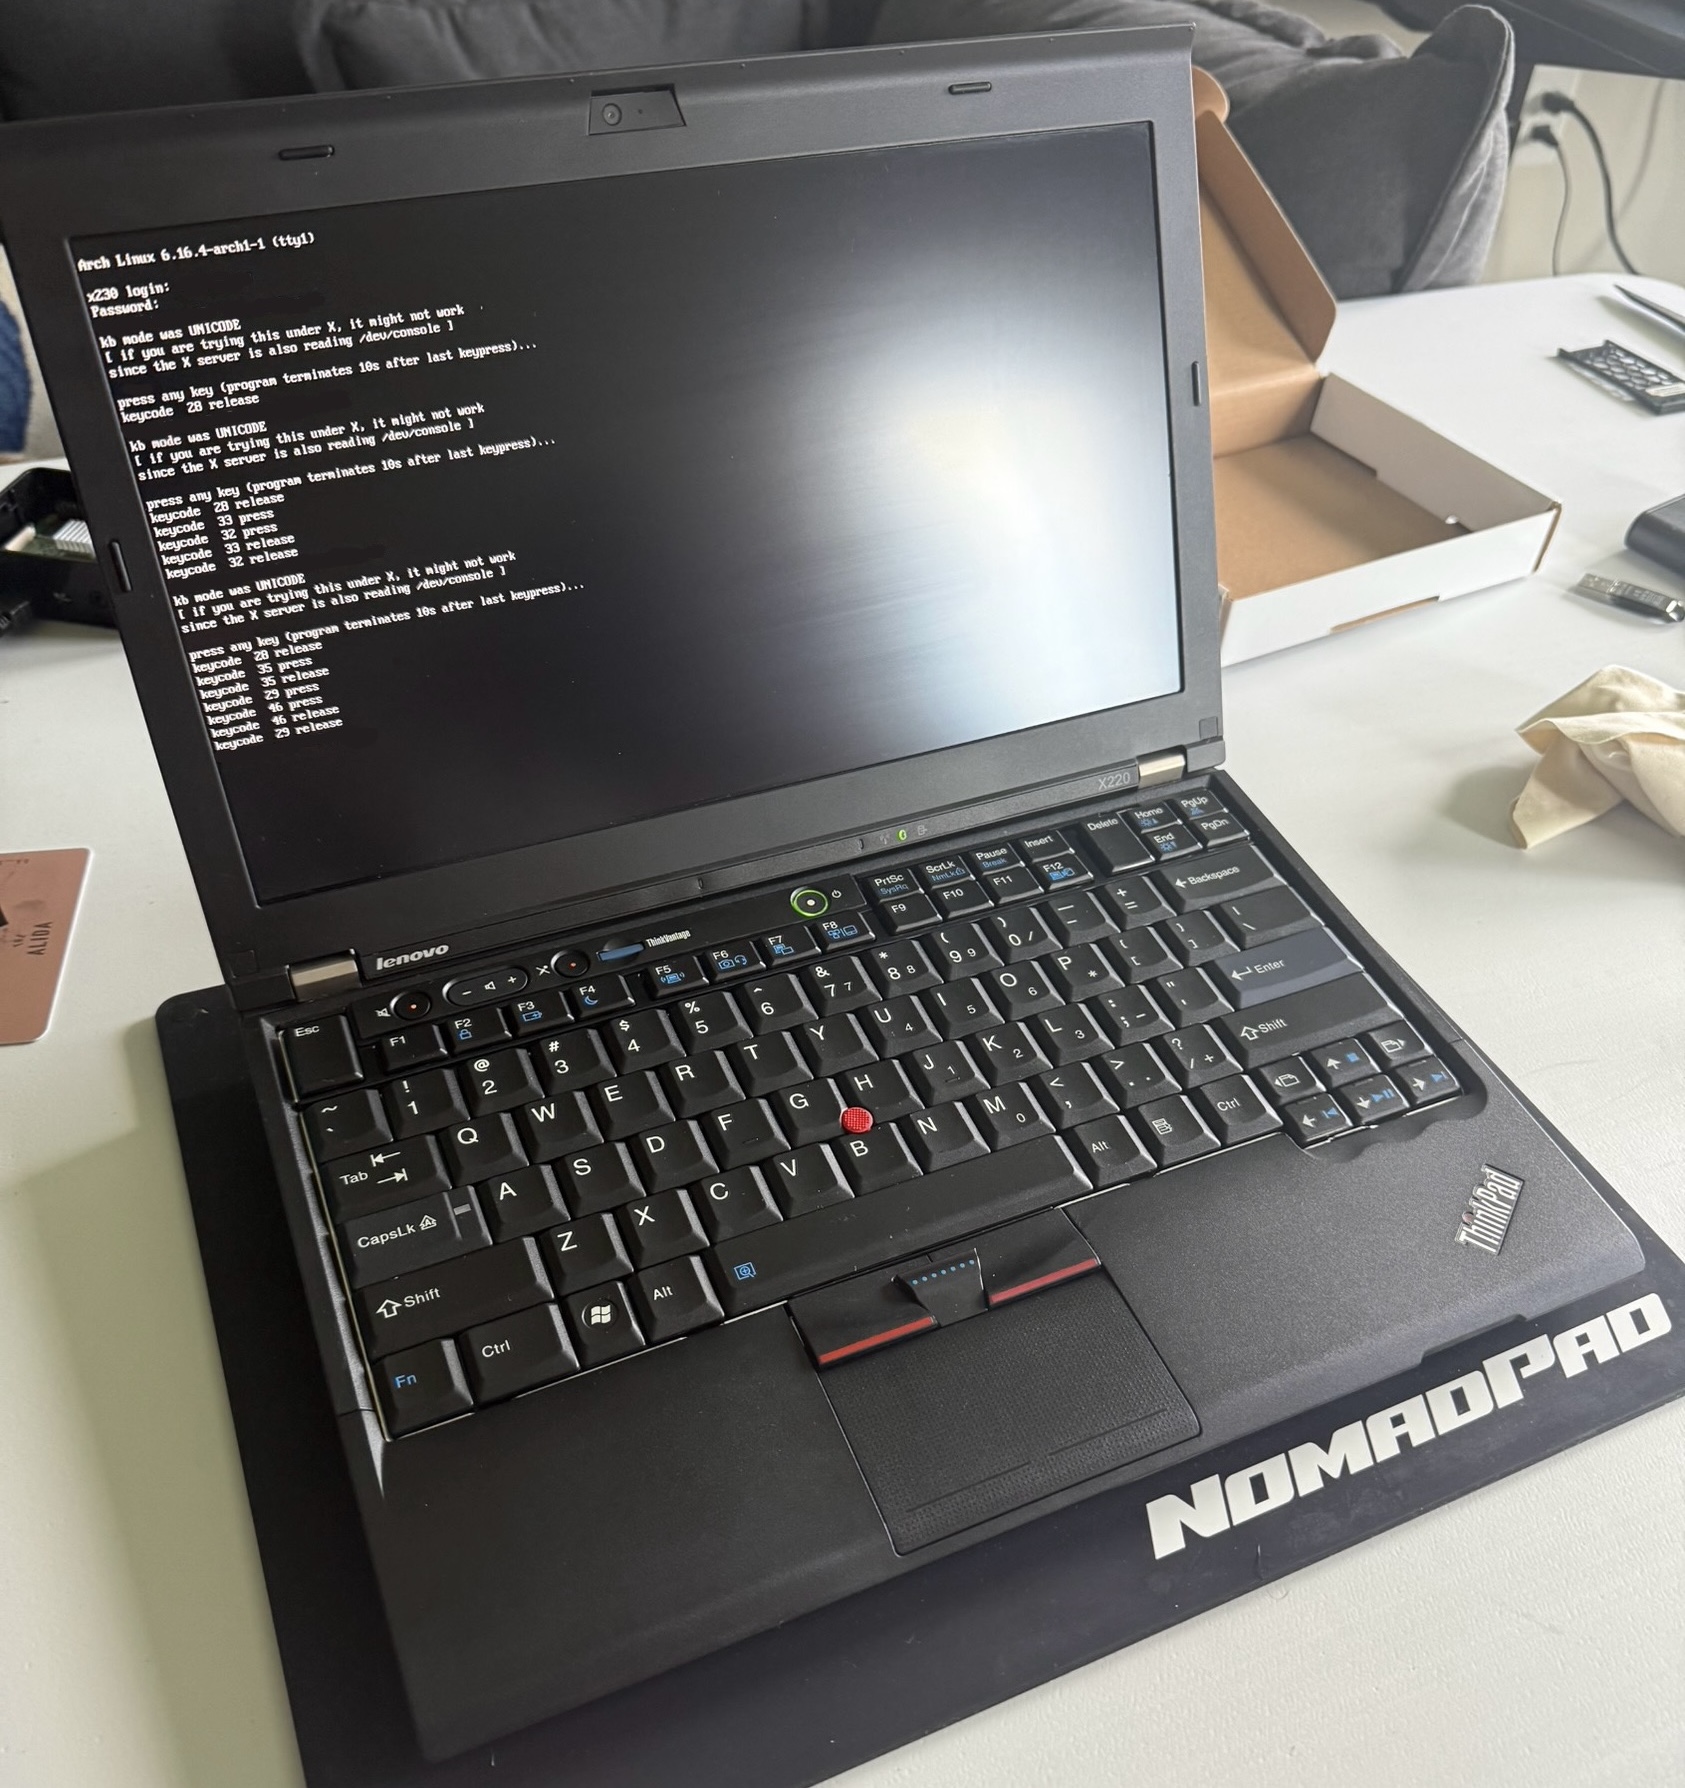
The goal was simple: preserve the Coreboot environment, keep the X230 EC untouched, and still make the 7-row layout productive. On Linux this is easy to live with. I captured the actual key events and bound them to the expected actions at the window-manager layer.
Detect keys
In X11, use xev to see what each key sends. If you’re on a tiling WM like i3 and want no desktop environment, that’s fine:
startx # then run xev in a terminal
Press a suspect key (e.g., brightness or the old “Menu” key) and note the keysym or keycode reported by xev.
Bind actions in your WM
In i3, I added bindings directly in ~/.config/i3/config so I don’t need a separate hotkey daemon:
bindsym XF86MonBrightnessUp exec --no-startup-id brightnessctl set +10%
bindsym XF86MonBrightnessDown exec --no-startup-id brightnessctl set 10%-
# Audio (PulseAudio)
bindsym XF86AudioRaiseVolume exec --no-startup-id pactl set-sink-volume @DEFAULT_SINK@ +5%
bindsym XF86AudioLowerVolume exec --no-startup-id pactl set-sink-volume @DEFAULT_SINK@ -5%
bindsym XF86AudioMute exec --no-startup-id pactl set-sink-mute @DEFAULT_SINK@ toggle
bindsym XF86AudioMicMute exec --no-startup-id pactl set-source-mute @DEFAULT_SOURCE@ toggle
If a key doesn’t report an XF86* symbol (for example, it shows up as F23), you can bind that directly:
bindsym F23 exec --no-startup-id brightnessctl set 10%-
This gives me working brightness, audio, mic-mute, and screenshots without touching the EC. For terminal and editor work, the remaining differences (Insert/Menu/PrtSc) aren’t show-stoppers.
Why This Path Is Reasonable
- Security stays intact: Coreboot + ME disable remains in effect.
- Operational simplicity: no EC reflashing cycle today; no risk of a mid-flash power loss.
- Reversibility: if I ever want the X230 chiclet keyboard again, I don’t have to touch firmware. Just swap the keyboard back and adjust bindings.
- Future-proof: if I later decide I want perfect hardware scancodes, I can revert to stock BIOS temporarily, apply
thinkpad-ec, then re-flash Coreboot. I already have verified SPI/EC backups.
If You Want the Full EC Route
The “ideal” firmware-first order for a pristine retrofit is:
- Keep stock Lenovo BIOS temporarily.
- Build patched EC with
thinkpad-ec(extract.FL1/.FL2from Lenovo package, run the project’s Makefile). - Flash from FreeDOS using Lenovo’s utility (
phlash16/updtflsh) per the repo guidance. - Verify key behavior in BIOS.
- Flash Coreboot (Skulls) and proceed with your Linux install.
That leaves you with a firmware-level perfect 7-row map that survives OS reinstalls.
Outcome
Swapping the hardware was straightforward. Because I had already moved to Coreboot, I chose to solve the remaining keymap quirks in software. The result is a clean, fast X230 with a classic typing experience, a secure firmware stack, and the flexibility to switch back to the chiclet keyboard without another firmware dance. For my workflow — terminals, Vim, browsing, scripting — this strikes the right balance between pragmatism and purity.
More Posts
- Why I built PDF Library - A Private, Distraction-Free Way to Read and Organize PDFs
- Customizing Arch Linux on a ThinkPad - A minimal i3 setup from scratch
- Flashing Coreboot on ThinkPad X230 - Disabling Intel Management Engine with Skulls firmware for enhanced security
- Arch Linux Installation on Legacy Hardware - Complete setup guide for 2012 ThinkPad X230
- Building a Secure Home Lab - Network design for remote access, media storage, and VPN infrastructure
- Building CalcPlus, PDFDarkMode, and MemoryPush - Why and how I built these mobile apps